
You Will Need:
- Plain paper-5” x 17”
- Mat board scraps
- Recycled or scrap paper
- Decorative paper
- Pencil
- Crayons
- Markers
- Colored pencils
- Liquid watercolors
- Ruler
- Scissors
- Glue stick
- Paper cutter
How to:
| To begin, fold the plain paper in half, lengthwise. | |
| Unfold, and then fold one side over so that the end touches this center crease, as shown. | |
| Repeat for the other side. Now unfold the paper, and fold the whole sheet back and forth in an accordion fold. | |
| To make the book covers, cut two pieces of mat board the same size as the surface of the folded paper, or 4.25”x5”. Materials needed will vary depending on the method you choose to decorate the cover. | |
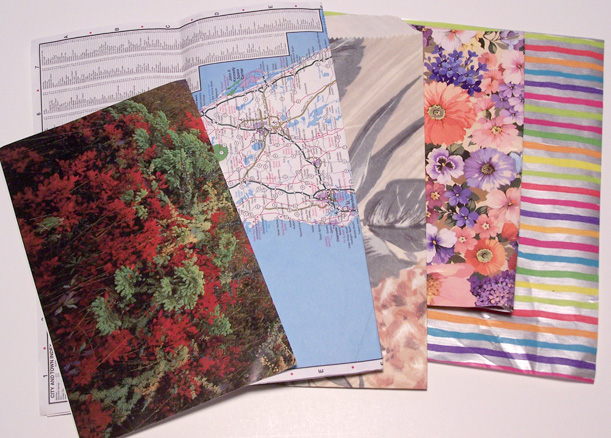
Ways to Decorate Paper for the Journal's Cover
Cover each board with an old road map, or use decorative paper such as leftover gift wrap, comics, or scraps of wallpaper.
old road map, or use decorative paper such as leftover gift wrap, comics, or scraps of wallpaper.
Use pliers to pull the felt-like nib from several dried up markers of the same color. Place the material into a jar and add a little water. Paint the unused side of scrap paper.
Remove the paper from a scrap crayon. Lay it flat on its side, and color the paper. Try using more than one color and go in both directions to make a plaid pattern. Vary the length of the crayon to make different size stripes.
Use a dark, thin marker to make loops all over a scrap of paper. Color in some of the areas to make a design.
On a scrap of paper, draw the same shape or symbol over and over again to make a repeat pattern.
Using crayons, heavily color a scrap of paper. Gently rub with a soft rag to polish.
| Place a used dryer sheet over a piece of wax paper or scrap of foam core. Soak with water from a paint brush. Using liquid watercolors in either cool colors (blues, greens, and purples) or warm colors (reds, yellows, and oranges), let the paint flow onto the material. | |
| Iron when dry between two pieces of white paper. Glue a scrap of colored gift wrap tissue to the backside of the dryer sheet. | |
| Using liquid watercolors, rubber bands, and a used dryer sheet, tie and dye the material. Tightly twist the dryer sheet into a rope, and keep it in place with rubber bands. Paint with watercolors. Dry, remove the bands, and iron between two pieces of white paper. When finished, glue a scrap of colored gift wrap tissue to the backside of the dryer sheet. | |
| Cut two pieces of paper 5.25”x6” for the covers, and lay them face down. Apply glue to the mat board, and center it on the paper. Turn it over, and smooth out any wrinkles. | |
| Reduce the bulk at each corner by clipping the paper at an angle at least 1/4" from the edge, as shown. | |
| Fold over the corners, glue and smooth down. Apply glue to the top and bottom ends of the paper. Fold over and smooth down. | |
| Do the same for the sides. Repeat these steps for the other cover. Complete the journal by gluing the end papers of the folded pages to the unfinished sides of the mat board, and smooth. | |
![]()
Tips and Tricks:
If you don't have access to a paper cutter, have an adult cut the cardboard using a utility knife in combination with a triangle, T-square, or ruler to keep the corners square.
Standard art paper measures 12” x 18”, so you can make two books from one sheet. However, if you ask for scrap paper at a printing company or quick print shop, an employee may give you longer pieces, enabling you to make a journal with more pages.
Please note that the thickness of the CD jewel case will limit how many pages your journal will hold.
Thank you recycleworks.org for this project.
0 comments:
Post a Comment